One of us cooks.
One of us crafts.
These are the results.
Commentary by Brittney will say "B", while commentary by Ashley will say "A".
A: Brittney and I were pretty "into" our theme: Farmers Market.
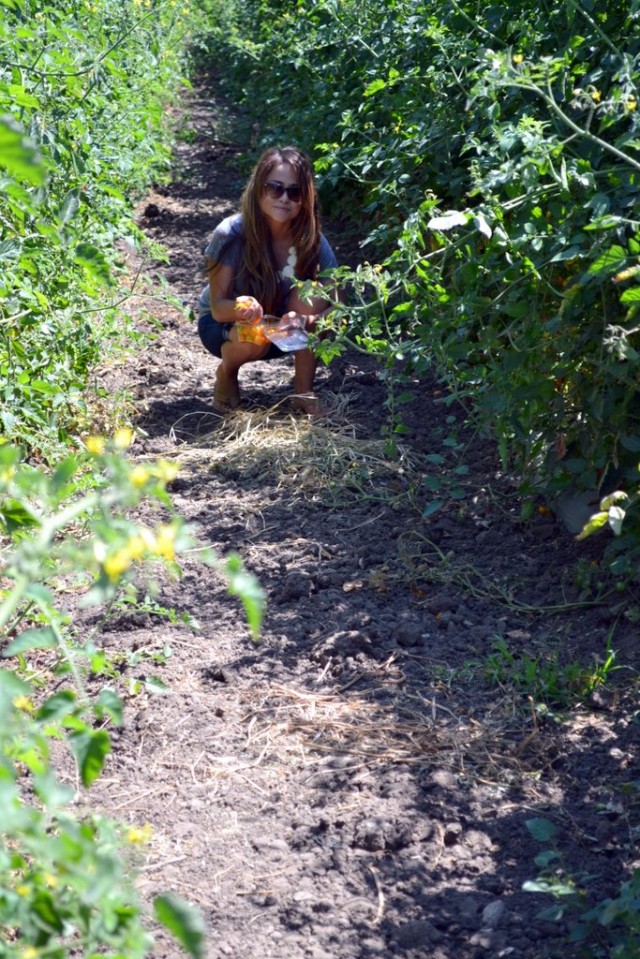
Which means that nearly every item we used in our dishes, we actually hand picked at the local Underwood Family Farm. Basically, we got poked by thorns, had dust caked between our toes and nearly broke our backs in 100 degree weather all in the name of a fresh and yummy meal for our dear friends--and it was totally worth it!
B: This part was so great... and so hot. I mean we picked a very hot day to be picking and so it actually wasn't as "fun" as it could've been :) On the other hand the produce was beautiful and ripe and we had Ashley's Mom with us to keep tabs on the kids while we were heads down thumbs up. (look at how tan Wesley's legs are!!)

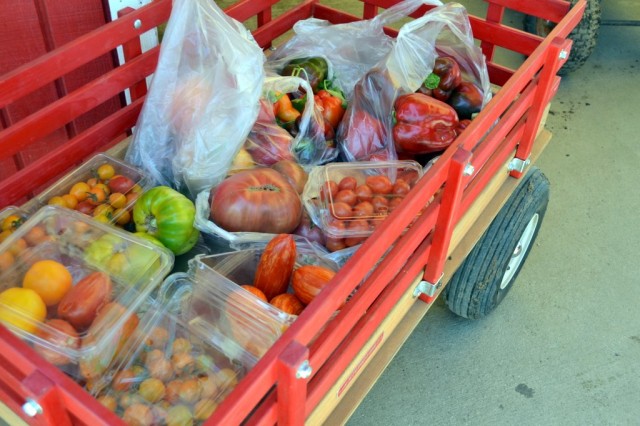
We filled an entire wagon with produce. People were staring.
A: Then Brittney and I went our separate ways to put the kids down for a nap.
Brittney worked on prepping all the food, because she is pretty much a pro chef {if you ask me}, and there was no sense in having me ruin everything.
Brittney worked on prepping all the food, because she is pretty much a pro chef {if you ask me}, and there was no sense in having me ruin everything.
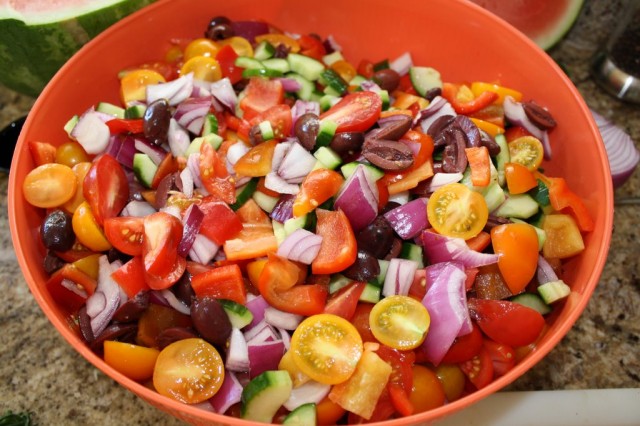
The beginnings of our Mediterranean salad. (All of our fresh farm veggies!)
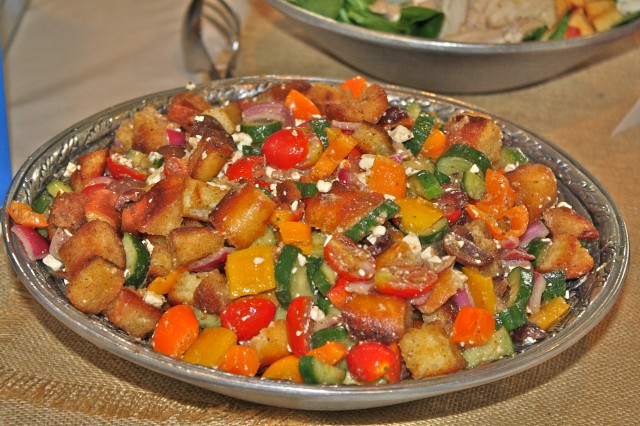
B: So the Mediterranean salad is a recipe that was given to me by my first partner Tressa, who cooked the first meal (and only other meal I have cooked since cooking meals in this club) we tested it but it didn't go as well with our other meal.. I couldn't stop thinking about it though! I have made it several times and the finished product picture below is actually from a different party. (same salad, different day) Because we ran into a few problems with this one. #1 the fresh produce was about 5x juicier than the produce I had used in the passed. This caused the salad to get very wet as it sat (it is better if it sits for at least a couple hours but better overnight) we had to pour off the wonderful juices. #2-The feta I used was the Costco sized one since we quadrupled the recipe.. problem with the Costco feta is there are a lot of tiny pieces which resulted in a rather white salad. It kind of appeared to have a creamy dressing which was actually not the case. #3-Usually adding the croutons 20-30 minutes before serving is perfect, but I failed to factor in the wetness and so the croutons were softer then they should have been. But! I still appreciated the freshness of this salad and I like those Mediterranean flavors. Hope you will too :)
Mediterranean Salad with Homemade Croutons
- Good olive oil
- 1 small French bread or boule, cut into 1-inch cubes (6 cups)
- Kosher salt
- 1 hothouse cucumber, unpeeled, seeded, and sliced 1/4-inch thick
- 1 red bell pepper, large diced
- 1 yellow bell pepper, large diced
- 1 pint cherry or grape tomatoes, halved
- 1/2 red onion, sliced in half rounds
- 1/2 pound feta cheese, cut in 1/2-inch cubes
- 1/2 cup calamata olives, pitted
For the vinaigrette:
- 2 cloves garlic, minced
- 1 teaspoon dried oregano
- 1/2 teaspoon Dijon mustard
- 1/4 cup good red wine vinegar
- 1 teaspoon salt
- 1/2 teaspoon freshly ground black pepper
- 1/2 cup good olive oil
Directions
Heat 3 tablespoons olive oil in a large saute pan. Add the bread cubes and sprinkle with salt; cook over low to medium heat, tossing frequently, for 5 to 10 minutes, until nicely browned. Add more olive oil as needed.
For the vinaigrette, whisk together the garlic, oregano, mustard, vinegar, 1 teaspoon salt and the pepper in a small bowl. While still whisking, add the olive oil and make an emulsion. Pour the vinaigrette over the vegetables. Add the feta, olives and bread cubes and mix together lightly. Set aside for 30 minutes for the flavors to blend. Serve at room temperature.
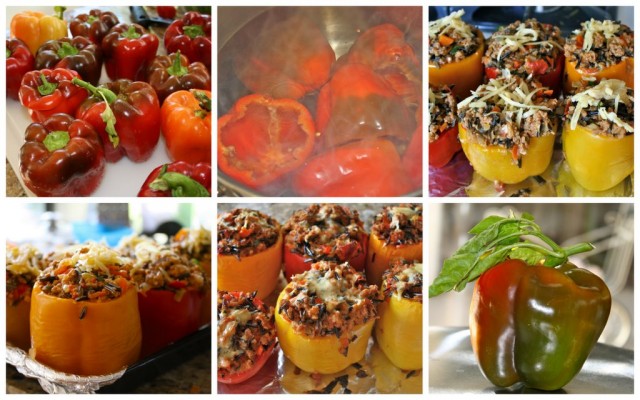
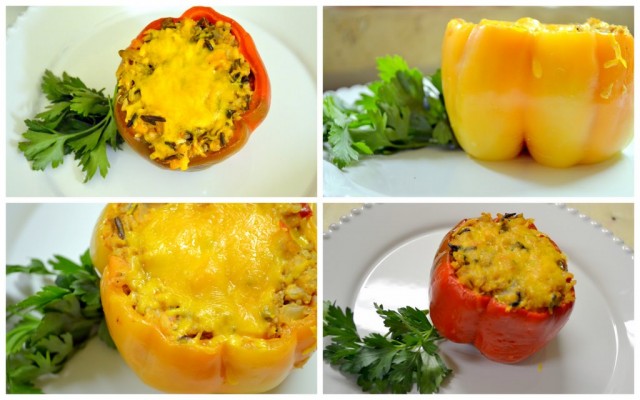
A: I'm not gonna lie--at first I was skeptical about stuffed peppers--but then Brittney introduced me to this version of stuffed peppers, and I am a fan for life. I even had a dream about them the other night--they are that good.
B: The peppers themselves were sweet and perfectly delectable all by themselves if you asked me, but stuffing them just made them a square meal. This is a recipe from the Healthy cooks illustrated Family Cookbook. We changed it only a bit by using ground turkey instead. One of the key steps is patting the peppers dry and not leaving them to drain too long upside down. (this traps heat in and they continue to steam)
- Stuffed Peppers Healthy Style
- 4 medium red, yellow or orange bell peppers, 1/2 inch trimmed off tops, cores and seeds discarded (about 6 oz. each)
- 1/2 cup long grain brown rice (I used wild rice from trader jos)
- 2 teaspoons olive oil
- 2 carrots, peeled and chopped fine
- 1 medium onion, minced
- 2 teaspoons tomato paste
- 6 garlic cloves, minced
- 1 teaspoon chili powder
- 2 tomatoes (about 12 oz.), cored, seeded, and chopped medium
- 1/4 cup low sodium chicken broth
- 1 cup shredded 50 percent light Cheddar (about 4 oz.) (we used regular not light, sorry, and half sharp half mild)
- 2 tablespoons minced fresh parsley
- 1 Tablespoon fresh lemon juice
Directions:
- 1Bring 4 quarts water to a boil in a large stockpot or Dutch oven over high heat.
- 2Add 1 tablespoon salt and bell peppers.
- 3Cook until peppers just begin to soften, about 5 minutes.
- 4Using slotted spoon, remove peppers from pot, drain off excess water and place peppers cut side up on paper towels.
- 5Return water to boil; add rice and boil until tender, about 25-30 minutes.
- 6Drain rice and transfer to large bowl; set aside.
- 7Adjust oven rack to middle position and heat oven to 350°F.
- 8Meanwhile, heat 12 inch heavy bottomed skillet over medium high heat until hot, about 1 1/2 minutes; add oil and swirl to coat.
- 9Add carrots and onion and cook, stirring occasionally, until softened, about 5-7 minutes. Stir in the garlic, tomato paste, and chili powder and cook until fragrant, about 30 seconds.
- 10Add ground beef and cook, breaking beef into small pieces with spoon, until no longer pink, about 5 minutes.
- 11Stir in the tomatoes and chicken broth and cook until the tomatoes begin to break down, 1 to 2 minutes.
- 12Stir the warm beef mixture, 3/4 cup of the cheddar, parsley , and lemon juice into the rice and season with salt and pepper to taste. Adjust an oven rack to the middle position and heat the oven to 350 degrees.
- 13Pat the inside of the peppers dry with paper towels, then place the peppers in an 8" square baking dish. Divide the filling evenly among the peppers and top with the remaining 1/4 cup cheese. Bake until the cheese is browned and the filling is heated through, about 30 minutes. Serve.per serving cal.340, protein 25 grams
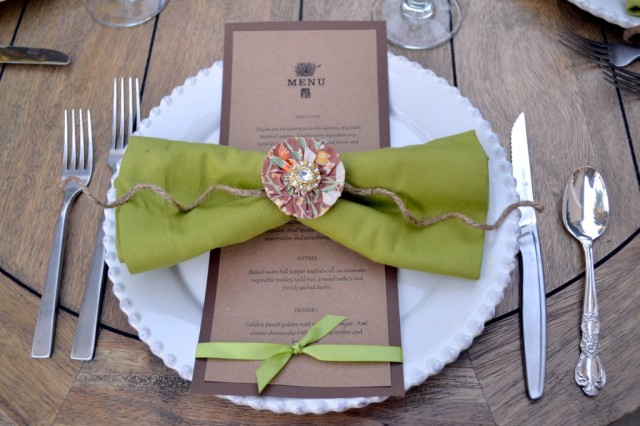
A: And while Brittney was busy slaving away in her kitchen, I was at home cleaning, crafting and organizing for the big event. Menu design, place settings, finding enough seats, drinks, flowers, candles, moving furniture--you name it.
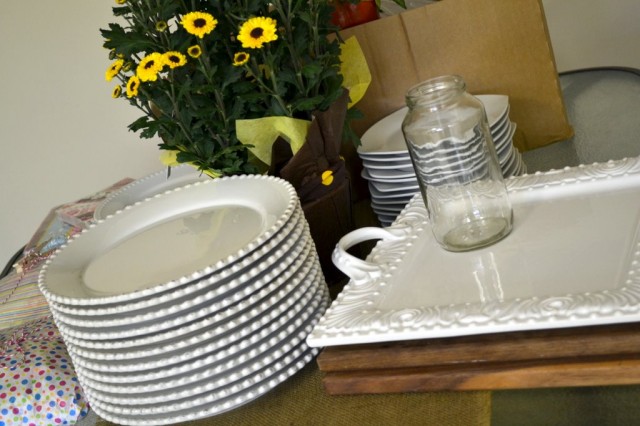
B: I am embarrassed that I can't take any credit for anything with the decor. The only thing I contributed was the mason jars on the table and some plates! Luckily Ashley had a vision!
I love how it turned out Ash!
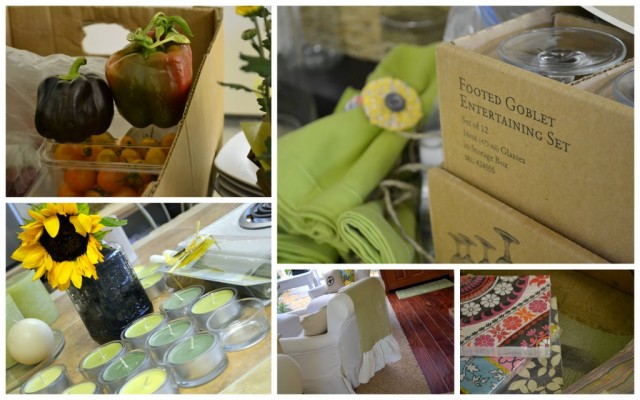
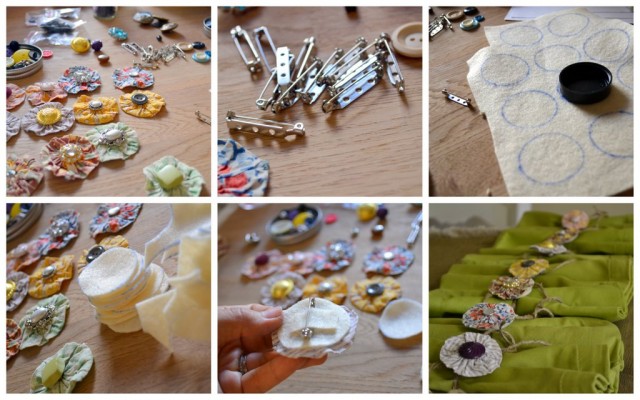
I made each guest a custom vintage yo yo brooch that I attached to their napkins,
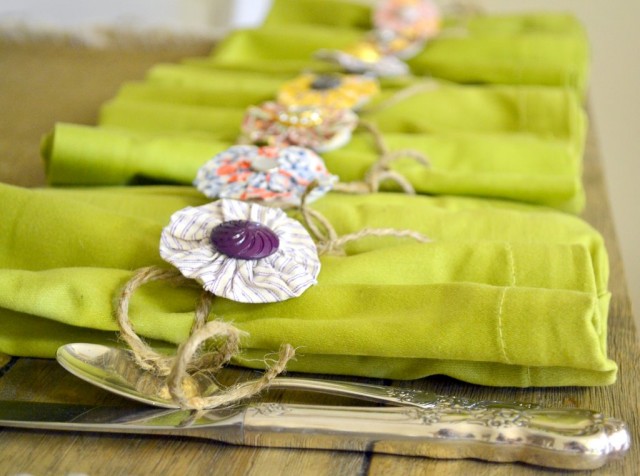
A: Brittney and I decided to have our dinner party on my back patio. I brought my kitchen table outside and put the leaves in so it could seat all ten of our guests {I purchased my table at Cost Plus World Market}. I still didn't have enough seating, so I added my craft room chair and my front patio bench.
Plates: Home Goods a year ago, but they usually still carry them.
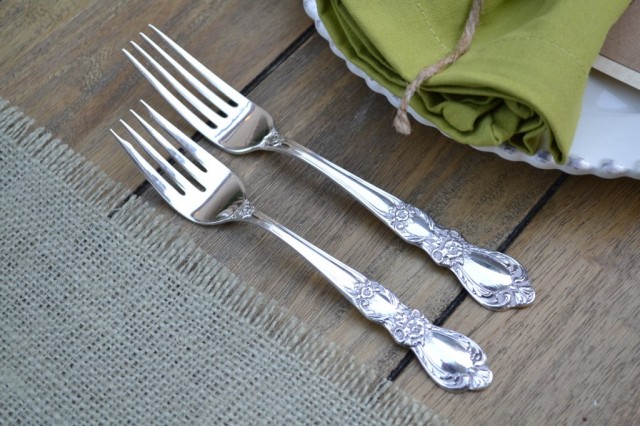
Silver utensils: my great grandma's, handed down
Goblets: Cost Plus World Market
Table Runners: LMM shop
Napkins: Cost Plus World Market
Candelabra: Home Goods
Sound track: Frank Sinatra on Pandora
Silver utensils: my great grandma's, handed down
Goblets: Cost Plus World Market
Table Runners: LMM shop
Napkins: Cost Plus World Market
Candelabra: Home Goods
Sound track: Frank Sinatra on Pandora
Each dish was served on its own plate--fancy restaurant style. Which meant we had to time every dish to be finished at the appropriate serving time--harder than it sounds.
We were subtle with our decor--twinkle lights, candles and sun flowers.
When the sun set, the backyard was glowing.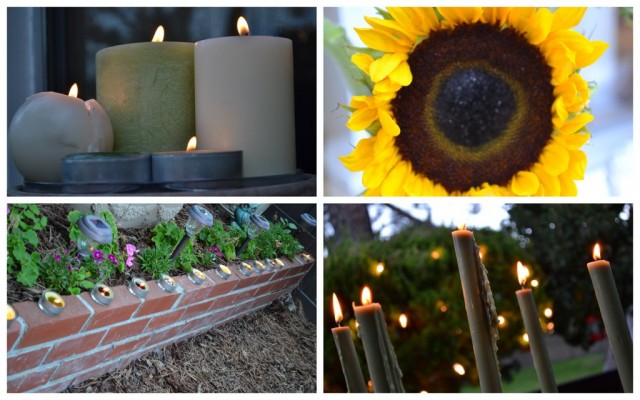
When the sun set, the backyard was glowing.

I downloaded a free menu template over at e.m. papers.
We put tea light candles in mason jars with water, so they would float.
A:Right outside my patio, we set up some adirondack chairs so we could enjoy dessert in a more intimate setting. When it was time to eat dessert, we all scooted out here, and I brought a tray of candles to give us some light.
B:I loved this part..
A: Looks like everything went pretty smooth, right?
Ha! Let's start with me burning the ONE dish I was in charge of--the appetizer.
I left the screenopen and my home became infested with moths.
A smoke alarm went off.
An oven mitt caught on fire.
A dessert was served still doughy.
And even though sweat was dripping from our backs and our foreheads,
we had a smile on our faces...and we even wore matching aprons c/o my Momma.

my necklace c/o Soleil Selene
Burned appetizer, quickly fixed by Brittney.
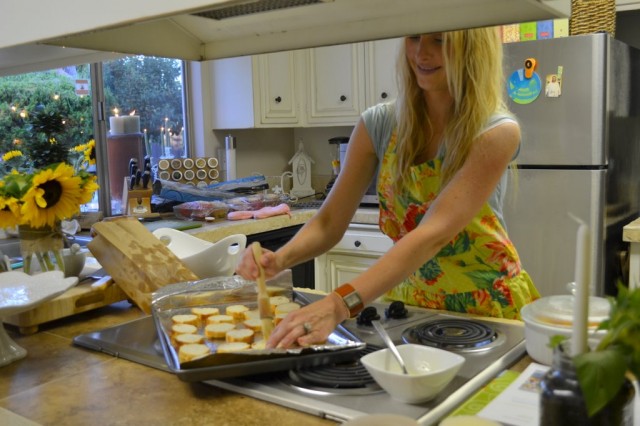
Fresh Fruit Bruschetta with Orange-Honey Cream
{from Our Best Bites cookbook}
Ingredients:
1 baguette or French bread loaf
4 tablespoons of butter, melted
2 tablespoons sugar
1/2 teaspoon ground cinnamon
1/2 cup sour cream
1 tsp orange zest
1 1/2 cups diced strawberries
1 cup finely diced mango
1 cup finely diced kiwi
1. Preheat oven to 400 degrees. Slice bread into 1/2 inch slices. Place in a single layer on a foil-lined baking sheet. Use a pastry brush to brush each piece with melted butter. Combine sugar and cinnamon and sprinkle evenly over bread slices. bake for 10-12 minutes or until edges are toasted. Set aside to cool.
2. While bread is toasting, combine sour cream, honey and orange zest. Stir to combine and place int he fridge.
3. Gently combine strawberries, mango and kiwi. When the bread is cooled, place about 1 tablespoon of fruit mixture on top of each toasted bread slice and drizzle with sweetened sour cream, mixture. If needed, thin the sour cream sauce with 1/2 tsp of orange juice. Garnish with mint leaves if desired.
B: The Summer Spanish Gazpacho was a huge risk, we really took a chance in serving it, and that is why we also served a salad. BUT Ashley and I both decided that because it was unlike any gazpacho we had seen or tried before, and because it incorporated so many in season vegetables and fruits, and because we could all use a daily dose of a V8 type vitamin blast, we would give it a whirl. What sold us was the tiny bits of garnish that we loaded the soup with. It gave it a fresh crunch of summer flavors! I saw the recipe here.
Appetizer: Fresh fruit bruschetta on a cinnamon sprinkled French baguette with an orange-honey cream drizzle. From Our Best Bites cook book.
Soup: Summer gazpacho with a watermelon and strawberry infusion. From Emeril on Good Morning America.
Salad: Mediterranean crouton salad with a red wine vinaigrette and feta cheese. See recipe above.
Entree: Baked sweet bell peppers stuffed with an aromatic vegetable medley, wild rice, ground turkey and freshly picked herbs. From America's Test Kitchen Healthy Family Cookbook {see recipe above).
Dessert: Golden peach galette with turbinado sugar. Adapted from Real Simple Magazine.
Classic Cheesecake with fresh Raspberries and a hint of lemon zest by Barefoot Contessa.
A:My favorite was the dessert. It was beyond yummy.
To think that these peaches...
To think that these peaches...
A: Brittney took the peach galette to the next level with a homemade pie crust and some peach brandy--pluis we went a little crazy with the turbinado sugar.
B: The peach galette was tested a number of times. The crust was really my favorite part of it, any fruit could be used.
Unfortunately we had never tested cooking one, let alone 2 of these in Ashley's oven and we were not nearly as succesful as our testing. One was doughy and the other overcooked, but PLEASE try it yourself! You will not believe how flakey and fabulous this crust is.
Good Description
http://smittenkitchen.com/2007/11/pie-crust-101/
Recipe
http://www.seriouseats.com/recipes/2007/11/cooks-illustrated-foolproof-pie-dough-recipe.html
There should literally be little chunks of butter/shortening visable (the shortening I used had been frozen)
For the filling I used about 7 peaches, pealed and slices. I mixed in as much sugar as I thought it needed (sorry no actual amount) and about 3 tablespoons of peach brandy. This really brings out the peach flavor. You can also use it in place of the Vodka called for in the crust recipe, just use a little more than it calls for and a little less water. (The crust recipe calls for a spirit that is 80 proof and my peach brandy was only 60 so I used a bit more) The pear brandy is also a great one for fruit crumbles, gallettes and pies and brings out the flavor of the fruit.
The turbadino sugar is a must. I tested with regular and it kind of melted away and lost that hint of molasses flavor. So after you have built your galette and folded the edges up you just use some of the juice from the bowl that your cut peaches were to paint on the edges and sprinkle with sugar.
Bake for 40 minutes at 375.
B: We really had to work for these raspberries. There were not tons of ripe ones and the ones that were ripe were very small. We needed lots of them, but, they packed a very true raspberry flavor and between the hint of lemon in the cheesecake portion and the raspberries, there was that freshness that lightened it up. I have made this several times recently and in all my testing this cheescake cracked. BUT on this final attempt, I did something different, I followed the recipe exactly :) It meant I had to set my alarm for 3am to put my finally fully cooled cheesecake in the fridge, but alas! It didn't crack!
And if your kitchen looks like this afterwards, then you know you did alright.








No comments:
Post a Comment